-
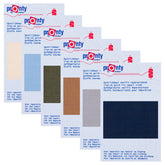
Pronty Iron-On Repair Patch 11x25cmThe iron-on cotton repair fabric is the perfect solution for mending holes, tears, and damages in clothing and fabrics. This repair fabric is made of supple cotton, allowing it to easily conform to the shape of the material and provide a strong bond for...
- €3,25
- €3,25
- Unit price
- per
-
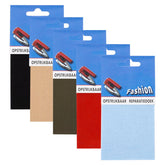
Iron-on repair cloth Fashion for clothing and fabrics 11x25cmThis Fashion iron-on repair cloth is the perfect solution for repairing holes, tears and damage in clothing and fabrics. This high-quality canvas is made of durable and flexible materials, allowing it to easily conform to the shape of the fabric and provide a strong...
- €2,95
€0,00- €2,95
- Unit price
- per
-
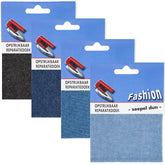
Repair cloth jeans smooth thin Fashion iron on 10x40cmThis supple thin jeans repair cloth is perfect for repairing holes and tears in your favorite jeans. With a size of 10x40cm, it offers enough material to carry out various repairs. The repair cloth is iron-on, making it easy to apply to the damaged...
- €3,95
- €3,95
- Unit price
- per
-
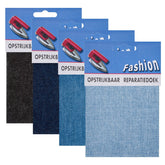
Repair cloth Jeans Fashion iron on firm 10x40cmThis sturdy jeans repair cloth is perfect for repairing holes and tears in your favorite jeans. With a size of 10x40cm, it offers enough material to carry out various repairs. The repair cloth is iron-on, making it easy to apply to the damaged areas....
- €3,95
- €3,95
- Unit price
- per
-
Repair cloth Sportswear | Jersey - StretchableA worn spot or hole in your tracksuit or favorite hoodie? This iron-on patch in mottled dark gray offers the perfect solution for stretchy fabrics! Ideal for Stretch & Mottled: The patch is flexible and stretches, essential for comfort in (sports) clothing made of...
- €4,25
- €4,25
- Unit price
- per
-
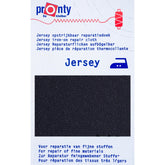
Stretch Repair Cloth Pronty | Jersey for stretch fabrics 12x45cmThe Pronty Jersey Repair Cloth offers a simple solution for repairing holes or tears in stretchable fabrics. This iron-on repair cloth is specially designed for fabrics with stretch, such as jersey, tricot and other machine knitted materials. Thanks to the stretchability of the repair...
- €3,25
- €3,25
- Unit price
- per
-
Stretch repair cloth black 40x6 cmRepair cloth stretch black for repairing and strengthening fine-meshed sweaters, sweatshirts and T-shirts The package contains a fine-mesh repair patch of 40x6 cm. The coated side is the customer with the adhesive layer. Instructions: Turn the damaged fabric inside out and spread it out...
- €2,95
- €2,95
- Unit price
- per
-
Stretch repair cloth white 40x6 cmRepair cloth stretch white for repairing and strengthening fine-meshed sweaters, sweatshirts and T-shirts The package contains a fine-mesh repair patch of 40x6 cm. The coated side is the customer with the adhesive layer. Instructions: Turn the damaged fabric inside out and spread it out...
- €2,95
- €2,95
- Unit price
- per
-
Iron-on repair cloth Jeans blue Pronty 10x40cm firmThe iron-on jeans repair cloth is the perfect solution for repairing holes, tears and damage in clothing and fabrics. This high-quality canvas is made of durable and flexible materials, allowing it to easily conform to the shape of the fabric and provide a strong...
- €3,95
- €3,95
- Unit price
- per
-
Iron-on repair cloth camouflage 1Sturdy iron-on camouflage repair cloth. The dimensions are 10x40cm
- €3,95
- €3,95
- Unit price
- per
-
Iron-on Repair Patch Camouflage 2Stevig opstrijkbaar camouflage reparatie doek. De afmetingen zijn 10x40cm
- €3,95
- €3,95
- Unit price
- per
-
Iron-on repair cloth camouflage MarineSturdy iron-on camouflage repair cloth. The dimensions are 10x40cm
- €3,95
- €3,95
- Unit price
- per
-
Repair cloth dark jeans - quick fix iron on ProntyThe iron-on repair cloth for jeans is the perfect solution for repairing holes, tears and damage in clothing and fabrics. This repair cloth is made of supple cotton, making it easy to conform to the shape of the fabric and providing strong adhesion for...
- €3,25
- €3,25
- Unit price
- per
-
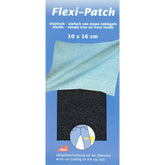
Jeans Repair Patch | Stretch | 10 x 16 cm Reverse | Flexi-Patch - donker blauw jeansKorte, elastische jeans reparatiedoek van Kleiber (10x16 cm) met lijmlaag aan de voorkant voor strijken aan de binnenkant. Ideaal voor het snel en eenvoudig herstellen van scheuren en gaten in jeans.
- €4,95
- €4,95
- Unit price
- per
-
donker blauw jeans
-
medium jeans
When repairing tears, holes, and other damage in textiles, repair fabric is an indispensable tool. Repair fabric, also known as iron-on repair fabric, offers a durable and simple way to mend various fabrics without the need for sewing. Whether you want to repair clothing, tent fabric, or household textiles, repair fabric is the ideal solution. In this article, we will delve deeper into repair fabric, how it works, and where you can buy it.
What is Repair Fabric?
Repair fabric is a special type of fabric used to mend tears, holes, and other damage in textiles. It is usually made of sturdy material, such as cotton or a blend of cotton and polyester, which allows it to adhere strongly to the fabric it is applied to. The repair fabric is iron-on, meaning it can simply be ironed onto the damaged area to perform the repair. This makes it a quick and easy solution for both small and large repairs.
Instructions for Ironing Repair Fabric
What you need:
Step 1: Preparation
- Ensure the garment is clean and dry before you start ironing the repair fabric.
- Preheat the iron to the cotton setting. This ensures the optimal temperature for ironing the repair fabric.
Step 2: Preheating the garment
- Place the garment on an ironing board or another flat surface.
- Iron over the area where the repair fabric needs to be attached for about 10 seconds. This helps to warm the fabric and makes it easier to adhere the repair fabric.
Step 3: Placing the repair fabric
- Place the repair fabric on the desired spot on the garment.
- Ensure the repair fabric is properly aligned and lies completely flat on the fabric.
Step 4: Protection with a cloth
- Place a tea towel or another thin cloth over the repair fabric. This protects the fabric from direct contact with the iron and prevents any damage.
Step 5: Ironing
- Press the iron with moderate pressure onto the cloth and move it slowly back and forth over the repair fabric.
- Iron for about 30 seconds to ensure the repair fabric adheres well to the fabric.
- Make sure you cover the entire repair fabric with the iron so it heats evenly.
Step 6: Check the result and cool down
- Carefully remove the cloth and check if the repair fabric is firmly attached to the fabric.
- Allow the repair fabric to cool down properly before using the garment again.
- If the repair fabric is not sticking well, repeat the ironing procedure with slightly more pressure and ironing time. However, be sure to avoid heat-sensitive synthetic fabrics.
Important tips:
- Do not iron on heat-sensitive synthetic fabrics such as PVC, nylon, acetate, or rayon, as these can melt or be damaged.
- If you are unsure about the fabric of the garment, check the care label for ironing and washing instructions.
- Be careful when handling a hot iron and ensure you do not get burned.
- Always follow the instructions and warnings provided with your iron.
With these instructions, you should be able to iron repair fabric onto a garment safely and effectively. Always remember to be careful and avoid heat-sensitive fabrics to prevent damage to the fabric and the repair fabric. Let the repair fabric cool down properly before wearing the garment again. If you have any questions, do not hesitate to ask them before you start ironing the repair fabric. Good luck with repairing your garment!
- Choosing a selection results in a full page refresh.
